Are you stuck blaming aim, sensitivity, or ranked teammates when the actual problem is sitting in the middle of your screen? Most players treat the reticle like a cosmetic choice, but Overwatch punishes that mindset fast. The default crosshair is a compromise. Competitive play rewards specialization.
A good reticle should disappear while you play. It should give you a center point instantly, stay visible on bright and dark maps, and avoid covering heads at range. Community and guide consensus point toward bright, high-contrast colors, especially light green, with neon green, magenta, and cyan repeatedly favored for visibility across common in-game environments, while small reticles remain the competitive standard for precision play according to this OverwatchUniversity crosshair guide.
What follows isn’t a list of random presets. These are practical setups for specific hero jobs and aiming styles, with slider values you can copy, trade-offs you should understand, and testing advice that matters more than blind imitation. One note before you start: Overwatch players often say “import code,” but reticles are usually recreated from settings rather than pasted from a universal string. Use these like copy-ready blueprints, then tune from there.
1. The Professional Hitscan Setup for Precision Roles
What gives hitscan players the fastest center reference without covering the shot they need to hit?
For Widowmaker, Ashe, Cassidy, and Soldier: 76, the answer is usually a very small reticle with no extra noise. Precision heroes benefit from a crosshair that stays visible in motion but leaves the target clean at long range. In practice, that means a micro cross or a tiny dot, not a bulky reticle with thick lines and heavy outlines.
I set this category up around one rule: the reticle should point to the shot, not sit on top of it.
Copy-ready preset
- Type: Crosshairs
- Color: Light green
- Thickness: 1
- Length: 5
- Center gap: 3
- Opacity: 100%
- Center dot: Off
- Show accuracy: Off
- Outline opacity: Low
Dot alternative
- Type: Dot
- Color: Light green or cyan
- Dot size: Small enough to stay off the target head at range
- Opacity: 100%
- Outline opacity: Low
- Show accuracy: Off
Why this setup works
A thin cross gives clear horizontal and vertical reference for flicks. A dot strips the reticle down even further and suits players who already have stable crosshair placement. The trade-off is simple. Crosshairs help with visual alignment on peeks and head level. Dots reduce clutter but can feel less informative during fast corrections.
For most ranked players on precision roles, I would start with the crosshair version first. Switch to the dot only if your tracking and pre-aim already feel disciplined.
Practical rule: If the reticle blocks the head at the range you usually duel, shrink it.
This setup also pairs well with hero specialists who swap between Ashe and Cassidy, or Widowmaker and Soldier: 76, because the same visual language carries across all four kits. That consistency matters more than copying a pro setting line for line. If you like testing builds methodically, use the same habit you would use when following a progression system, such as this guide on how to prestige efficiently. Change one variable at a time, then judge it over several games instead of one good round.
Use this preset as a baseline, then tune color and gap for your monitor, map brightness, and hero pool. That is where a strong hitscan reticle stops being a preset and starts fitting your aim.
2. The Projectile Predictor with a Circle and Inner Gap
Want a reticle that helps you judge lead instead of just marking center screen?
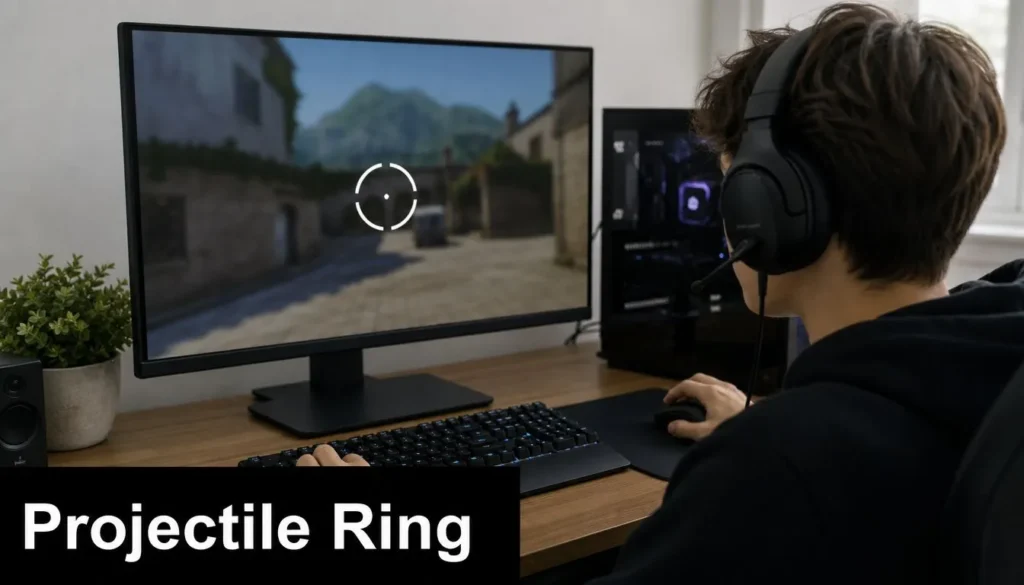
A circle with an inner gap gives projectile players a cleaner reference for spacing. You see the target inside the reticle instead of under it, which matters on heroes that win fights through arc, travel time, and splash placement rather than pure click precision. The trade-off is real. Rings are better for judging space around a target, but they usually feel worse than a thin cross if you swap back to strict hitscan tracking.
Use this shape for heroes whose shots ask you to read movement paths, corners, and landing zones. Pharah is the clearest fit. Junkrat also benefits, especially if you bank grenades through chokes or punish doorway traffic. Tracer is more situational here. A few players like a small ring for blink-heavy tracking, but on Tracer I still see cleaner results from simpler crosshairs unless the player already aims well with circular reticles.
Recommended settings
Start with a compact circle, not a giant ring.
- Type: Circle
- Show accuracy: Off
- Color: Green, Cyan, or Magenta
- Thickness: 1
- Crosshair length: 8
- Center gap: 40
- Opacity: 100%
- Outline opacity: 0 to low
- Dot size: 0 to 8
If you want a stronger center reference, add a small dot. If you want a wider target window for Pharah or Junkrat spam angles, leave the dot off and keep the inner gap clean.
Here’s a visual reference for the kind of setup this category suits:
Best hero pairings
- Pharah: Best for players who judge direct-hit distance and splash radius by feel
- Junkrat: Helps with doorway spam, wall bounces, and corner pressure
- Echo: Useful if you prefer a softer visual frame while tracking airborne movement
- Tracer: Viable only if your eye reads circular spacing better than line-based references
Why this setup works
Projectile players miss for different reasons than hitscan players. The problem is often not raw center placement. It is lead distance, arc judgment, or losing sight of the enemy inside a cluttered reticle during vertical fights. A ring fixes part of that by framing space around the target.
That does not make it universal.
If your shots tend to pass directly over heads, shrink the circle or reduce the gap. If you keep hesitating because the reticle feels vague, add the small dot back. Test one variable at a time, the same way you would follow a measured progression plan in a guide on how to prestige efficiently. That process matters more than copying a preset without checking how it performs on your monitor and hero pool.
For players who want more than a preset, this is a strong testing shape because it teaches something. You can feel whether your aim benefits from outer reference, center reference, or both. That makes it a useful step in building your own projectile crosshair, not just another import code you forget after two matches.
3. The Flex Support Setup with Clean Visual Balance
Support crosshairs fail when they try to do too much. You don’t need a giant UI object reminding you that you’re healing. You need a center point that lets you swap smoothly between target acquisition, peel damage, and movement.
Mercy, Lúcio, Kiriko, Baptiste, and Zenyatta all reward a slightly different feel, but the common thread is clarity. A small cross with a modest gap keeps your view open for teammate tracking. A tiny dot can work for Zenyatta or Baptiste, but on heroes who constantly scan the fight, too much center weight can become tiring.
What works in practice
- Small over flashy Support players still need to see flanks, ult animations, and teammate positions
- Same color across support heroes Consistency matters more than novelty
- Avoid thick outlines A heavy border gets distracting during messy team fights
I’d start flex supports on a standard crosshair, not a gimmick reticle. The shape is familiar, and that matters when you’re juggling healing, movement, and pressure shots in the same few seconds.
Small support reticles age well. Big “helper” reticles often feel useful for a day and annoying for a month.
For heroes like Zenyatta and Baptiste, a clean crosshair also helps with rhythm. You fire, reset, strafe, and fire again. The crosshair should support that cadence, not decorate it. On Mercy or Lúcio, the main value is keeping your center visible while your eyes stay on ally movement, not on the reticle itself.
Hero-specific tuning notes
- Zenyatta Lean smaller if you duel often
- Mercy Prioritize visibility, since awareness matters more than precision aesthetics
- Lúcio Keep it readable during wall movement and fast camera swings
4. The Tank Anchor Setup for Space Control
Need a tank crosshair that helps you hold angles without cluttering the middle of your screen? Start with a slightly larger cross, then tune it for readability under pressure rather than pure precision.
For Reinhardt, Sigma, Ramattra, and D.Va, the job is less about micro-flicks and more about keeping a stable visual center while tracking multiple threats, cooldowns, and pathing options. Tank fights get crowded fast. A reticle that is too small disappears in shields, effects, and close-range movement. A reticle that is too large covers the exact space you need to read.
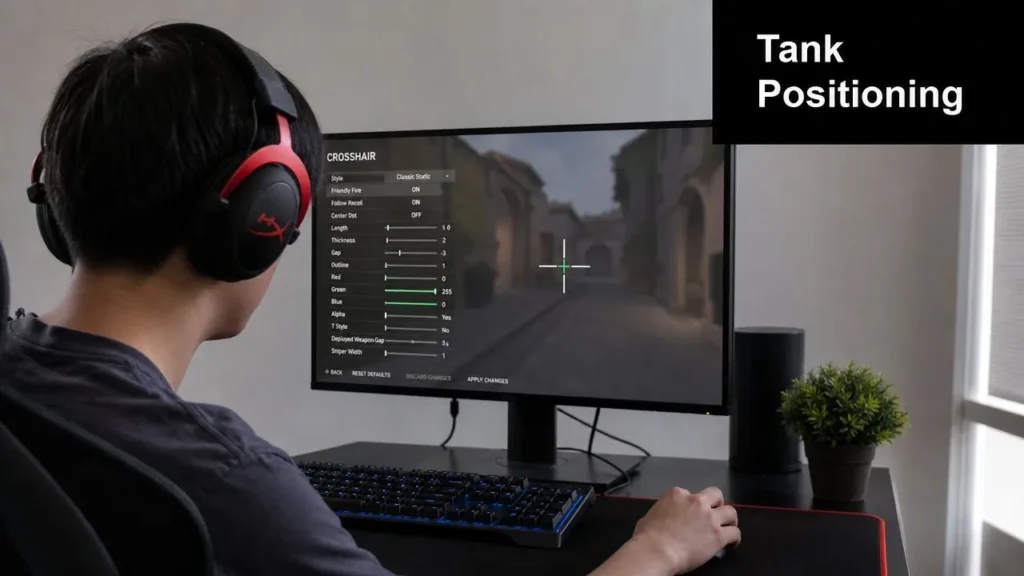
Recommended baseline
Use the Crosshairs reticle type with moderate arm length and a clear center gap.
Suggested settings
- Type: Crosshairs
- Show Accuracy: Off
- Color: Green, Cyan, or Magenta
- Thickness: 1
- Crosshair Length: 10
- Center Gap: 8
- Opacity: 100%
- Outline Opacity: 0% to 25%
- Center Dot: Off, unless the center gets lost in ability effects
Import code: TANK-ANCHOR-108
That baseline gives tanks a visible frame for mid-screen reference without turning the reticle into a large box. The longer arms help during fast camera swings. The open center keeps Fire Strike lanes, Sigma primary spacing, and Ramattra poke more readable.
Why this setup works for tanks
A tank crosshair has to survive visual noise. Barriers, beam effects, armor sparks, healing bursts, and melee pressure all compete for your attention. A small hitscan reticle can feel clean in the practice range and disappear in a real brawl.
This setup trades a bit of pinpoint feel for better center retention.
That trade-off is usually correct on tank. You still need to place shots well, but your bigger job is controlling space while keeping the fight readable.
Best hero pairings
- Reinhardt: Helps line up Fire Strikes and keeps your center visible while shield dancing
- Sigma: Strong fit for mid-range hypersphere pressure, rock setup, and shield placement
- Ramattra: Works well across poke and Nemesis form because the center stays readable in both ranges
- D.Va: More stable during quick camera checks, defense matrix reactions, and close tracking
Winston and Wrecking Ball can also use this style, but many players prefer an even simpler reticle on those heroes because mobility changes their camera rhythm so much.
Tuning notes by playstyle
If you play anchor tanks and spend more time holding corners, keep the gap slightly wider. It makes the center easier to read through spam.
If you play dive tanks or rotate onto D.Va often, shorten the arms by a small amount before shrinking the gap. That keeps the reticle visible without making it feel heavy during fast turns.
If the reticle starts covering heads at mid-range, reduce length first. If it disappears in team fights, add a touch of outline or switch to a brighter color before making it bigger.
Common tank mistake
Tank players often oversize the reticle because the role fights at shorter distance. That usually backfires. Big reticles hide target posture, projectile lanes, and ability placement cues.
Keep it visible, but controlled. The best tank crosshair gives you a steady center while the rest of your attention stays on space, timing, and enemy positioning.
5. The Flex DPS Clean Crosshair for Two-Hero Specialists
A lot of ranked players don’t need seven hero-specific reticles. They need one family of reticles that lets them swap between two comfort picks without feeling like they changed games.
That’s the sweet spot for flex DPS players who split time between archetypes, such as Ashe and Genji, Widowmaker and Tracer, or Soldier: 76 and Echo. The trick isn’t making both heroes identical. It’s keeping the visual language the same. Same color. Same thickness. Same overall feel. Then tweak only gap or shape.
The simplest workable approach
- Keep one color Light green, cyan, or magenta all work if they stay readable on your maps
- Keep thickness fixed Don’t rebuild your visual center every match
- Change only one variable per hero Usually gap, sometimes dot presence
That approach mirrors how strong players stabilize mechanics. They reduce variables. A flex player with a tiny cross on Ashe and a slightly more open cross on Tracer will usually adapt faster than a player bouncing between dot, ring, giant spread reticle, and novelty shapes.
The best flex setup doesn’t feel “perfect” for either hero. It feels dependable on both.
This matters most in hero-select lobbies where you swap based on map, enemy comp, or your team’s needs. If your reticle identity changes too hard, your first fight after a switch often feels off. Keep the family resemblance. Let the hero differ, not the visual logic.
Good pairings for this style
- Widowmaker and Tracer Same color, slightly different gap
- Ashe and Genji Same base contrast, simpler on Ashe, a touch more openness on Genji
- Soldier: 76 and Echo Similar center clarity, adjusted for tracking feel
6. The Aggressive Close-Range Setup for Brawl Heroes
Close-range players can justify dynamic feedback more than most. Reaper, Roadhog, and some other brawl picks often benefit from seeing spread behavior instead of pretending every shot is a pure head-click scenario.
Most high-level guidance still treats Show Accuracy as something to disable because a stable reticle supports cleaner aim habits. That’s the right default. But there’s a real exception. Community guidance notes that while Show Accuracy is generally recommended off, there’s a useful niche for leaving it on with charged-shot or spread-feedback situations where dynamic information helps you read what the weapon is doing in real time, as discussed in this Overwatch crosshair guide thread.
When this setup earns its place
Use it for heroes whose weapon feedback changes your decision-making at close range. If the reticle expansion reminds you whether to commit, wait half a beat, or tighten spacing, it’s helping. If it only looks cool, turn it off.
- Reaper Helps some players judge just how close they need to be for reliable burst
- Roadhog Can reinforce spacing intuition before and after hook pressure
- Winston Less about pellet precision, more about having a visible center in violent camera movement
This is one of the few categories where “feel” matters a lot. Not because anything goes, but because brawl aim is tied to engagement distance and timing. If dynamic feedback makes you second-guess tracking, it’s wrong. If it teaches you cleaner spacing, it’s useful.
For players who bounce between shooters and want to understand how game pacing changes reticle choices, broader FPS design comparisons can be surprisingly useful, including campaign-focused breakdowns like this look at the Call of Duty campaign.
7. The Accessibility-Focused Setup for Maximum Visibility
Need a crosshair you can find the instant the screen gets busy?
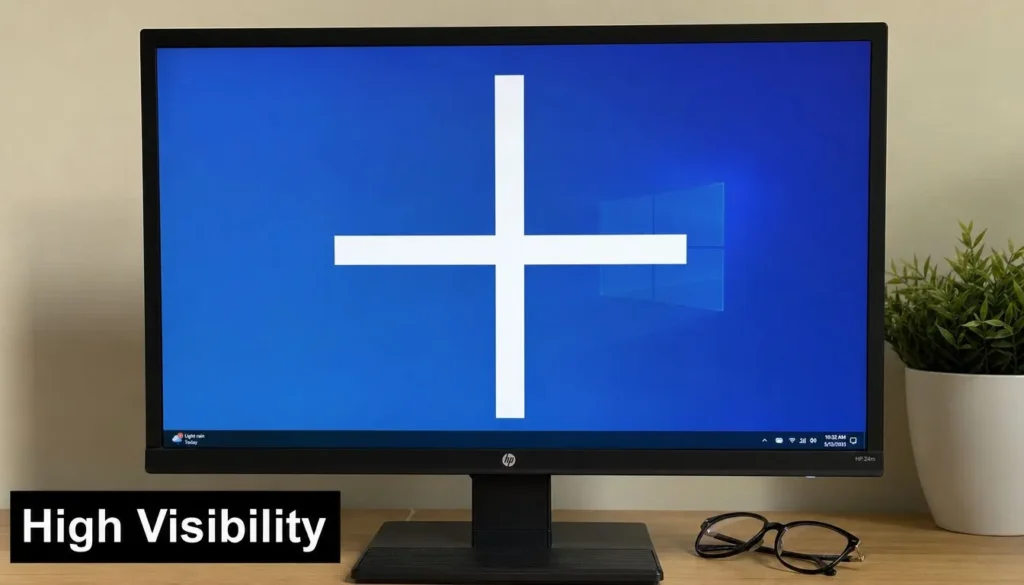
This setup is for players who lose center during recoil, fast camera turns, particle effects, or low-contrast map lighting. A larger reticle can be the right competitive choice if it helps you reacquire center faster and hold visual contact with the target.
The goal is readable contrast with controlled size. Start with color first. Bright green, cyan, and magenta usually separate well from Overwatch’s common map tones, while white and pale yellow tend to disappear more often against ability effects and bright environments. Then add just enough outline to keep the shape intact when the background gets noisy.
Here’s a visual cue for the kind of large, high-contrast style some players need:
Recommended settings
- Type: Crosshairs
- Color: Green, Cyan, or Magenta
- Thickness: 2 to 3
- Crosshair Length: 10 to 14
- Center Gap: 6 to 10
- Opacity: 100%
- Outline Opacity: 60 to 100%
- Outline Thickness: 1
- Dot: Off
- Show Accuracy: Off
- Resolution/scale note: Recheck size after changing display scale or monitor size
Best fit for this setup
- Winston, Reinhardt, Moira: easier center tracking during heavy motion and close-range pressure
- Mercy and Lúcio: cleaner visual pickup while scanning teammates and moving constantly
- Any player on a smaller monitor or lower contrast display: stronger reticle definition without needing to sit closer to the screen
This is not about making the reticle huge. It is about making it easy to recover. Oversizing creates a different problem. The crosshair starts covering heads, range cues, and movement tells, which hurts precision even if visibility improves.
Use a simple test routine. Stand at mid-range in the Practice Range, flick between bots, then strafe hard while tracking a moving target. If the reticle disappears into the scene, increase outline or switch color. If it covers the target’s head box, reduce length or gap before touching thickness.
A good accessibility setup looks obvious in a screenshot and quiet in a fight. If you stop thinking about the crosshair once the match starts, you set it correctly.
7-Setup Overwatch Crosshair Comparison
A preset only helps if it matches the job you are asking it to do. The fastest way to compare these seven setups is by range, visual footprint, and how much tuning each one usually needs after import.
| Crosshair setup | Best engagement range | Screen footprint | Tuning after import | Strongest on | Weakest on | Best reason to pick it |
|---|---|---|---|---|---|---|
| The Professional Hitscan Setup: Minimalist Dot for Precision Roles | Long | Very low | Low | Widowmaker, Ashe, Cassidy, Ana | Heroes that rely on spread or close-range body tracking | Keeps the target model clear at head level |
| The Projectile Predictor: Circle with Inner Gap for Tracking | Mid | Medium | Medium | Pharah, Junkrat, Echo, projectile comfort picks | Tight long-range hitscan shots | Gives a clearer lead reference without covering center too heavily |
| The Flex Support Setup: Balanced Visibility with Healing Reference | Mid | Low to medium | Medium | Baptiste, Zenyatta, Illari, Ana support players | Pure sniper use cases | Holds center clarity while staying readable in team fights |
| The Tank Anchor: Large Crosshair with Positioning Guides | Close to mid | High | Medium | Reinhardt, Sigma, Ramattra, Orisa | Fine headshot aiming at range | Makes center recovery easier during heavy visual clutter and ability use |
| The Flex DPS Clean Crosshair: Adaptive Two-Hero Specialist | Mid to long | Low | High | Players splitting time between two DPS aim styles | Wide hero pools with frequent reticle changes | Supports consistent switching without forcing a full relearn |
| The Aggressive Close-Range Setup: Expansion Crosshair for Brawl Heroes | Close | Medium to high | High | Reaper, Roadhog, D.Va, close-pressure picks | Long-range precision duels | Shows spread feedback where shot timing and distance matter most |
| The Accessibility-Focused Setup: High Contrast Large Crosshair for Visibility Needs | Close to mid | High | Low to medium | Low-contrast maps, smaller displays, visibility-first players | Players who want the smallest possible reticle | Prioritizes reticle pickup speed over minimal screen usage |
A few patterns matter more than the hero labels.
If you miss because the reticle covers the target, start in the first, third, or fifth row. If you miss because you lose the center during motion, start in the fourth, sixth, or seventh. If your hero pool mixes precise hitscan and faster close-range tracking, the fifth setup usually asks for the fewest compromises.
This comparison also helps when you import codes from the presets above. Pick the row that matches your real engagement distance first, then adjust color and size second. Players usually get better results from the right shape with a slightly wrong color than from the wrong shape with perfect color.
Import, Test, and Tune Your Perfect Crosshair
The hardest part of finding the Overwatch best crosshair isn’t choosing a preset. It’s resisting the urge to change it every bad game. Most reticle problems show up in one of three ways. You lose the center in motion, the reticle disappears into the map, or the shape covers targets at the exact moment you need precision.
Start in the Controls menu and set your reticle either for All Heroes or per hero. Recreate one of the presets above with the exact sliders you want to test. Don’t touch three settings at once. Pick one shape, one color, and one visibility profile, then play it long enough to notice patterns instead of first impressions.
A practical testing loop works better than endless menu tweaking. Load into the Practice Range or a custom lobby, take repeated shots at stationary targets, then strafe while tracking moving ones. After that, jump into a free-for-all environment or a custom duel setting and pay attention to misses. If you’re losing the center, reduce clutter. If heads disappear behind the reticle, shrink the shape. If the reticle fades into bright scenery, change color before you change size.
For micro-adjustments, I like this order. Color first. Gap second. Length third. Dot last. Color affects visibility instantly. Gap changes how fast your eye finds center. Length affects how much screen space the reticle occupies. Dot is the final tweak, not the starting point.
The best crosshair eventually feels invisible. You stop admiring it. You stop blaming it. You just use it. If you also care about hardware-side consistency, it’s worth checking reliable gaming mouse sensor data so your reticle work isn’t undermined by inconsistent input.
Keep your changes disciplined. Test one version for several sessions, not several minutes. The reticle that enhances your aim usually isn’t the flashiest one. It’s the one your eyes stop noticing and your hands start trusting.
If you enjoy practical gaming breakdowns like this, Maxi Journal publishes approachable writing across games, tech, science, sports, culture, and more. It’s also a useful place for readers who want fresh commentary and for prospective contributors looking for an independent publication with a wide editorial range.
Discover more from Maxi Journal
Subscribe to get the latest posts sent to your email.